Thursday, October 29, 2009

My Wedding Broom

Jumping the broom has become one of the most popular traditions in African American weddings over the years. Its suppossed to be a symbol of sweeping out the old and welcoming the new, a symbol of new beginnings.

A friend of mine, Nobi DeLon, made a beautiful broom for us to use at our wedding as a bridal shower gift for me. She just asked me what our wedding colors would be and surprised me with this lovely custom broom. Check it out!

Photobucket

My Wedding Programs

With so many different wedding program styles out there, it took me awhile to finally figure out which one I would go for. I didnt want anything too simple but I also recognized if I went for something too complicated...it would take alot of time especially trying to do over 200 of them.

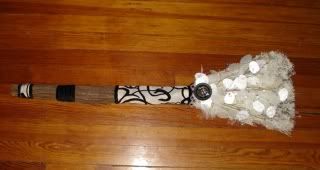
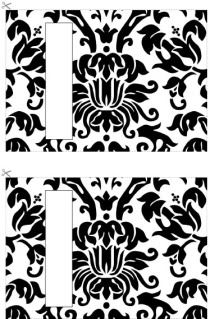
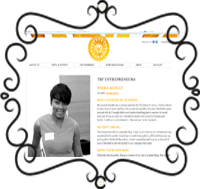
Initially, I wanted to do a layered program. I created a mockup and everything...see below.
Photobucket
But, I ended up changing my mind because I thought it would take too much time to put them all together.

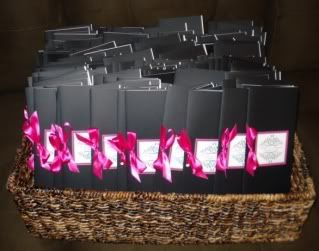
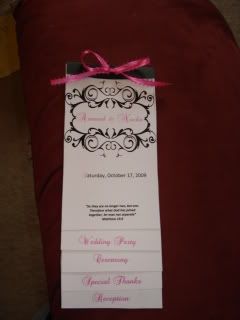
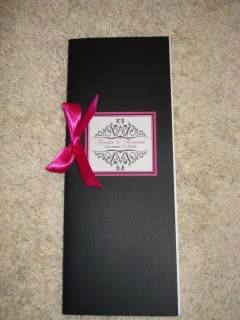
Ive always liked programs folded the long way so I decided to go with that style instead. I ordered black linen cardstock from www.paperandmore.com. Great site for all kinds of paper. If you are planning to use black cardstock for the outside of your programs, linen cardstock is great! Its a very rich color unlike some of the cheaper black cardstock out there. But it runs about $18 or so for a pack 100 sheets.

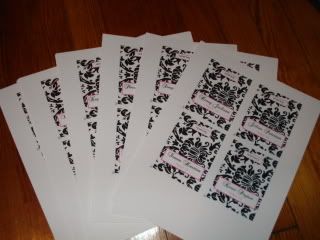
So to create my programs, the first thing I did was create the labels that went on the outside. I used Powerpoint and printed them up on sticker paper.

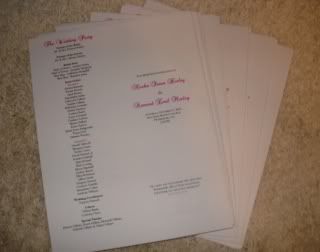
Next, I cut all of them out (220 to be exact). Thank God my sister cut out most of them for me! Thanks Yanna :) After cutting the labels, I started folding the cardstock and placed labels on outside.
Photobucket

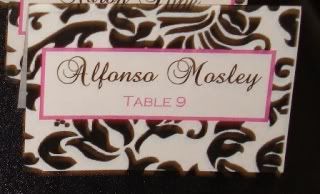
Then the hubby created the inside of program using Microsoft Publisher then converted it over to a PDF file. This was a huge help because I was swamped by this time so it was so sweet of him to do this part! Then we printed them out ... front side and back.
Photobucket

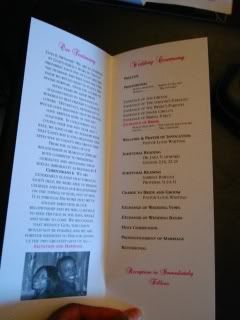
Next we folded everything up and inserted the inside into the linen cardstock.
Photobucket

Now we used the hole puncher to poke two holes in the program. (Beware, it was a little hard poking holes through the cardstock. Lets just say it gives your hand a really good workout! lol) Once holes are in, we tied ribbon thru it and made a bow.
Photobucket

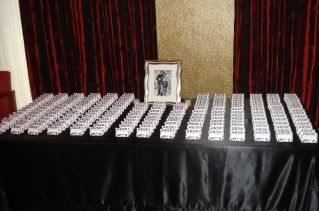
Lastly, get a pretty basket and put all your finished programs in it! Yippie.. all done! :)
Photobucket

Wednesday, October 28, 2009

VENDOR REVIEW: EmpireSupplies.com

As I blog about everything I did for my wedding, I will review some of the vendors or companies I used. Todays Vendor Review is on www.empiresupplies.com! DONT BUY ANYTHING FROM THIS COMPANY!!! I repeat DONT SUPPORT THIS COMPANY!!

I placed an order for wedding sparklers on Oct 8, 2009. The website says they ship out of Northvale, NJ....which isnt far from the Philly area so you would think it should not take long to receive it. I JUST received the package on Oct 26...over a week AFTER my wedding! Not to mention, their website told me it shipped a long time ago but I see on the package that the shipping label wasnt even created until 10/22!!! I tried to reach out to the company numerous times via phone and email and to this day have yet to hear back from them. The site says they have great customer service but thats definitely not the case!!

So if you do decide to buy something from them, keep your fingers crossed that you actually get it in a timely manner! I will NEVER shop buy from them again! And will be sure to tell everyone not to buy anything from that site either!!

P.S. This is the only bad vendor review I have :)

My Monogram Wedding Cake Topper

Initially I didn't plan to use a monogram letter for the cake topper but changed my mind (as brides often do...lol) and decided to go with it!

After searching all over the web for a reasonably prices monogram cake topper with rhinestones, I came up on a site, www.weddingcuts.com. They have pretty much any font you can think of and lots of options. I wasn't sure which height letter to go with but they had a chart that helps you determine the best size.

You can buy a letter with or without rhinestones. But the letter with rhinestones was over $100!! And you know I wasnt about to pay that for something I can do myself! :) Sooo, I ordered the plain letter in brushed silver (5 inches tall) which came up to around $40 or so. Then I went and bought some rhinestones (two different sizes) and tacky glue and bedazzled it out myself! Check it out:

JUST STARTING....
Photobucket

HALF WAY THERE....
Photobucket

ALL DONE!!
Photobucket

This is a very simple project that anyone can do! Why spend over $100 on something you can tackle yourself? Buttt just know, it takes awhile to do. I watched prob 3 one hour longs shows while doing it! lol

My Damask Wedding Placecards

I went through alot of designs I wanted to use for our placecards. And since we used the Damask theme, I wanted to incorporate that into the placecards. I came across a really cute black & white template on a website (cant remember which one) and decided to go with that for placecards. I customized it a little by adding a pink border and inserted pink and black font. And I also added a box on the back of card with each person's food choice.

Once I printed them all up, I took them to Kinko's and had them cut out. It cost about $12 or so. They charge $1.49 per cut. Once they were cut, we folded them in half and whala ... all done! :)

Here is the original template:
Photobucket

BEFORE they were cut:
Photobucket

AFTER they were cut:
Photobucket

Photobucket

BACK of Placecard:
Photobucket

Email me if you want me to send you my template (nnekah@gmail.com)!

My Wedding Shoes - THINK PINK!

One popular thing alot of brides are doing these days is wearing colored shoes! My official wedding colors were black & white with hints of hot pink. So I decided to wear pink shoes with my dress to add some pop!

But finding a pink shoe was alot harder than I imagined it would be. Lets just say my wedding shoe hunt was quite a long process. I found a pink pair of Stuart Weitzman shoes that would have been perfect but they were from last season so they weren't available anymore. Alot of the designer shoes I saw I wasn't really feeling or they werent dyable. So I finally started looking up dyable shoes and lets just say there are a limited amount of those I thought were cute. So I finally decided on a shoe by Coloriffics called Desire. See below
Photobucket
Remember, when ordering shoes you want to be dyed, get white. Dont make the mistake I made by getting ivory because they cant dye them if they aren't white.

But I ordered them from a GREAT shoe website - www.endless.com
They have FREE Overnight shipping and a no hassle return policy! I actually ordered 3 pair of shoes I was contemplating before deciding on the Coloriffics shoe. They came in the next day, I tried them on, then immediately sent them all back once I determined none of them worked for me. They do free return shipping too! Cant beat that!

Once I was ready to get the shoe dyed, I found a local spot to dye them. They charged $38. Im not sure if that was too much or not but I didnt have time to look around.
Here is how they turned out:
Photobucket

Another cute little thing I saw while browsing the internet during my wedding planning were stickers that brides put on the bottom of their shoes that say "I do" but I forgot to order some, so I went to my fav store Micheals and got some cute letter stickers and put my own on the bottom. They were only $3.99 for a pack and they actually turned out much cuter to me than the stickers I had seen online. Check it out:
Photobucket

Monday, October 26, 2009

DIY Project #6: Invitations

Wedding invitations can get very pricey! So instead of spending alot of money on invitations, I took a trip to Michaels and found the perfect white and black invites for only $39.99 a box and with a 40 or 50% coupon. I got them for even less.

Here is the kit I used (30 ct). Everything comes in it: mailing envelopes, blank invitations, reply cards & envelopes, stickers to close envelopes and blank mailing labels (which I didnt use). I ended up buying about 5 boxes. Make sure you buy extras just in case you have printing issues like I had.

Photobucket

Here is our actual invitation
Photobucket

Front of invitation
Photobucket
I created the mailing labels myself using Powerpoint and printed them out on sticker paper that can be purchased at Staples. So if you are up for creating your own labels and cutting them out yourself, its a great way to add some pop to your invite! Also in case you are wondering, I used Brockscript font and Copperplate Gothic Light font for my labels. If you would like me to email you the template I created, just email me at nnekah@gmail.com

Back of invitation
Photobucket

Not bad for DIY Invitations right? And I only spent about $130 for about 150 invitations butttt beware, it took alot of time to do them!

IM BACK!!!

Im officially back from our honeymoon and we had a GREAT time! The wedding was a dream come true. It totally came together as I envisioned it and all on a budget!!! Cant beat that! ;)

Im so thankful to the Lord for blessing me with such great family and friends who came out to support us. And most importantly, Im so grateful for my wonderful new husband, Armond! Love you babe!

So stay tuned because I will be updating my blog with all the things I did for my wedding as well as pics of course!!

Sincerely,
Mrs. Nneka H Mosley (wow, Im a "mrs." now) Lol
Related Posts with Thumbnails